
How we repair a leaking windscreen
From leak diagnosis and controlled removal to correcting the failed bond, refitting the original glass and successfully recalibrating the ADAS camera.
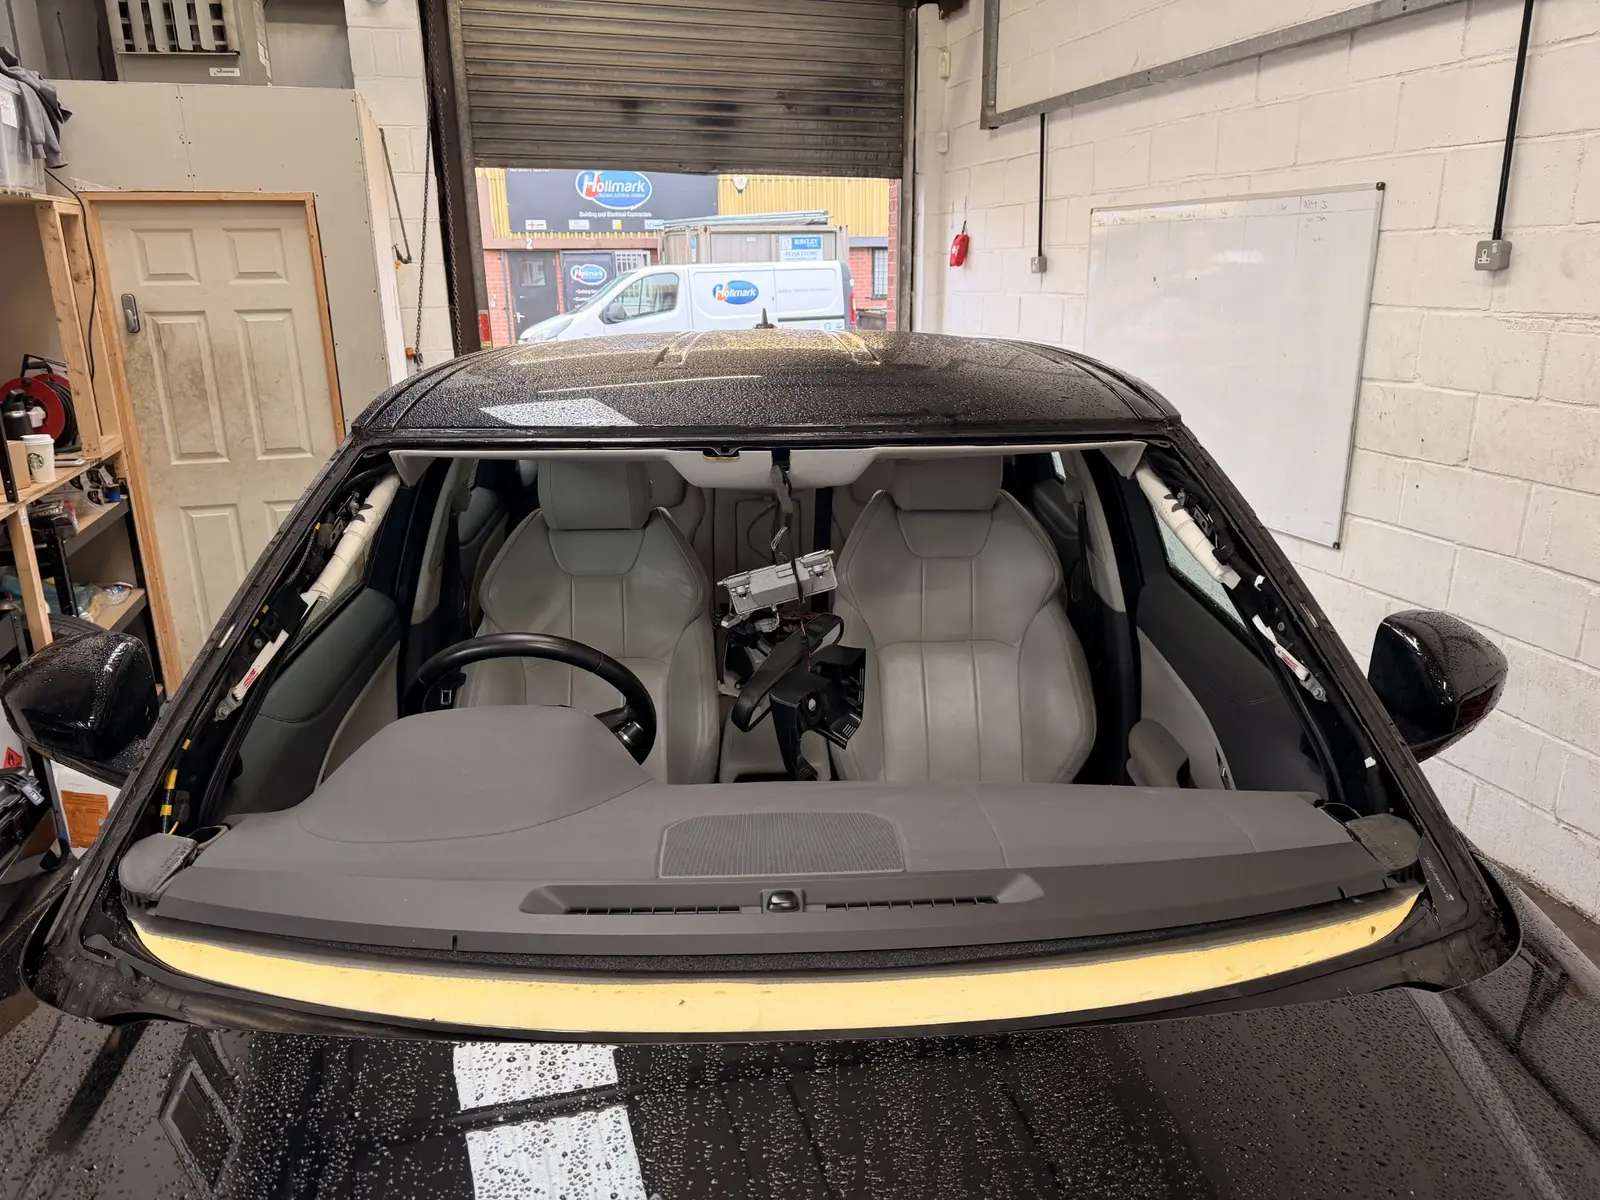
Two separate faults had to be corrected.
This was not a case of adding sealant around the outside. The windscreen needed to be removed so the failed bonding interface and a separate gap in the factory body seal could both be accessed and repaired correctly.
Upper primer failure
The factory primer separated from the glass along the top edge while the polyurethane remained attached to the vehicle.
Incomplete body seal
Two sections of the factory-applied body seal did not meet, leaving another possible water-entry route.
Original glass retained
The windscreen was removed intact, stripped, cleaned, reprimered and safely rebonded.
ADAS recalibrated
The forward-facing camera completed its required calibration successfully after refitting.
Find the route before disturbing the glass
Water can travel behind trims, so the visible damp area is not always the entry point. We document the vehicle first, test the likely routes and only remove the windscreen when the evidence points to the bond or surrounding aperture.
Pre-inspection and leak assessment
Before anything is removed, we identify where the water is entering and check whether the windscreen or its bonding is responsible. Existing vehicle damage is recorded and the glass is inspected for chips, cracks or weaknesses that could affect removal.
This establishes a clear starting condition and prevents an unrelated leak route from being mistaken for a windscreen fault.
Controlled strip-down
The wipers, scuttle panel, exterior trims, interior mirror and camera covers, and relevant A-pillar trims are carefully removed. Wiring and heated-screen connections are managed without strain, while fixings and components are organised for accurate reassembly.
This exposes the full windscreen edge and adhesive bond so the glass can be cut out in a controlled way.
Windscreen removal and glass inspection
The original windscreen is cut out carefully so it can be inspected and, where safe, reused. The exposed bonding band on the glass immediately shows whether the polyurethane remained correctly attached to the primer.
On this vehicle, the evidence was consistent with a loss of adhesion at the factory-applied primer interface along the upper edge. The factory primer had separated from the glass rather than providing a stable surface for the adhesive.
Inspect the remaining adhesive around the aperture
With the windscreen removed, the adhesive bead is inspected around the entire body aperture. The side and lower sections appeared sound. At the top, the polyurethane remained attached to the vehicle while the factory primer had separated from the glass and stayed with the adhesive bead.
That pattern isolates the main failure to the upper primer-to-glass interface rather than suggesting that the complete bond had failed.
A separate factory body-seal defect
The inspection also uncovered a second, separate water-entry route. A factory-applied body seal had not formed a complete watertight join where two automated application sections met, leaving a small opening in the aperture.
This matters because simply rebonding the glass would not address a gap beneath it. The incomplete joint must be cleaned, prepared and resealed as part of the repair.
Build the new bond on sound surfaces
A new bead is only as reliable as the surfaces beneath it. Failed primer, loose polyurethane, grease and contamination are removed before the correct cleaning and priming system is applied.
Cut back the old polyurethane on the body
The remaining polyurethane is trimmed with a controlled cut-back blade. Loose, uneven and excessively high material is removed while a thin, consistent layer of sound adhesive is retained where appropriate.
The aim is to create a stable base for the new polyurethane without damaging the painted aperture or exposing bare metal unnecessarily.
Remove the failed primer and adhesive from the glass
Because the original primer was the failed interface, the old polyurethane and unstable primer are removed from the windscreen bonding band. Applying new adhesive over a weak layer would simply preserve the original fault.
The glass is taken back to a fresh, clean surface ready for the correct preparation system.
Clean and degrease the prepared glass
The exposed bonding area is cleaned and degreased with BETACLEAN 3350 to remove dust, grease and remaining surface contamination. It is applied using a specialist white cleaning block that contains an additional integrated cleaner, giving the surface a thorough two-stage cleaning action.
The prepared band is allowed to dry fully and is not touched again before priming. Even light contamination or fingerprints can affect adhesion.
Apply fresh primer to the glass and body
Fresh primer is applied evenly to the prepared glass and the required areas of the vehicle aperture. For this repair we used BETAPRIME 5504G—part of a different preparation system from the factory Sika primer identified earlier.
The primer is given the required drying and flash-off time before adhesive application. This stage establishes the stable interface that the original upper bond was missing.
Create a continuous seal and rebuild the vehicle
The new polyurethane bead, repaired body-seal joint and prepared original glass must come together without gaps or contamination. The windscreen systems and every removed trim are then returned to their original positions.
Apply a fresh polyurethane bead
After the primer has dried, BETASEAL 1580 polyurethane windscreen adhesive is applied directly to the vehicle aperture using a powered gun. The bead is kept continuous and consistent in height and thickness around the complete opening.
Particular attention is paid to the repaired upper area and body-seal joint. A break, low point or poorly joined section could create a new water path.
Prepare the glass for installation
The windscreen is secured on a padded trestle using professional lifting handles so the prepared bonding band is not touched. Heated-windscreen tags are positioned and protected with tape to prevent folding or damage during the lift.
A new upper trim is fitted evenly to the glass and cut to length, restoring the correct finished edge before the windscreen is installed.
Seat the windscreen and rebuild the exterior
The windscreen is lowered into the fresh adhesive, positioned accurately and checked for even contact. Once correctly seated, the scuttle panel, windscreen wipers and exterior side trims are returned to their original positions.
The paired photographs show the exposed areas before reassembly and the same areas after the components were securely refitted.
Reconnect the heated screen, sensors and ADAS camera
The heated-windscreen connections are installed and secured. The rain and light sensor is refitted against its correct glass area, and the forward-facing ADAS camera is returned securely to its original mounting bracket and reconnected.
These components support functions such as screen heating, automatic lights, rain-sensing wipers and camera-based driver assistance, depending on the vehicle specification.
Refit the interior trims
The A-pillar trims, rear-view mirror and protective camera and sensor housing are reinstalled. Each clip is checked, wiring is kept clear and the trim is aligned around the airbag areas without trapping or exposing cables.
Even trim gaps and secure housings confirm that the interior has been returned to its original arrangement.
Check the complete repair before handover
A professional remove-and-refit does not finish when the glass goes back in. The completed exterior, every removed component and the windscreen-mounted safety systems are checked before the vehicle is released.
Completed exterior
The exterior trims, scuttle panel and wipers are checked for correct alignment and secure fitting. The windscreen position and surrounding finish are inspected from close range and across the full front of the vehicle.
The lifting handles remained temporarily attached during the final workshop checks and were removed before handover.
Final tool and parts check
The tool trolley and parts containers are checked after reassembly. Every trim, fixing and vehicle component removed during strip-down must be accounted for and returned to its correct position.
This final housekeeping check also confirms that no tool has been left inside the vehicle and that the working area is clear.
Successful ADAS recalibration
The forward-facing camera is recalibrated after the windscreen has been removed and refitted. Even when the original glass is reused, a very small change in the position of the windscreen or camera can alter how the system interprets the road ahead.
Calibration realigns the camera with the vehicle centreline and confirms that supported functions—such as lane assistance, traffic-sign recognition, collision warning or automatic emergency braking—receive accurate information. The diagnostic display records that this vehicle’s calibration completed successfully.
Dealing with water inside your vehicle?
A damp footwell or headlining does not automatically mean the windscreen bond has failed. We assess the likely route first and explain whether the glass needs to be removed.